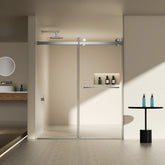
How to Measure for a New Shower Door: A Step-by-Step Guide
1. Introduction
When I first decided to upgrade my bathroom, one of the biggest challenges I faced was figuring out how to measure for a new shower door. It might sound simple, but getting those measurements right is absolutely crucial. Whether you're installing a sleek frameless shower door or a traditional framed one, an accurate fit can make all the difference in both appearance and function.
Incorrect shower door measurements can lead to a host of problems—doors that won’t close properly, water leakage, awkward gaps, or even the dreaded need to return a custom order. Trust me, it’s much easier (and cheaper) to measure twice and install once.
In this step-by-step shower door measurement guide, I’ll walk you through everything you need to know—from identifying your shower type to using a tape measure correctly, checking for plumb walls, and recording your dimensions with confidence. Whether you're a DIYer or just preparing for a professional installation, this guide will help you avoid the most common mistakes and get the perfect fit for your bathroom.
2. Tools You’ll Need
Before I started measuring for my new shower door, I gathered a few basic tools to make the process as smooth and accurate as possible. Trust me, having the right tools on hand can make a big difference—especially when you're trying to get precise dimensions for a custom or frameless shower door.
- Measuring Tape: This is your most essential tool. Use a sturdy, retractable tape measure with clear markings. Make sure it extends at least 72 inches to accommodate most shower door heights.
- Level: A standard bubble level helps check if your walls are plumb (perfectly vertical) and if your shower base is level. Frameless shower doors, in particular, require precise alignment to function properly.
- Pencil and Paper: Jotting down your measurements immediately helps avoid confusion later. I also like to sketch a rough diagram of the shower layout to note where each measurement was taken.
- Optional – Laser Level or Digital Measuring Tool: If you’re aiming for top-notch accuracy—especially in larger or more complex enclosures—these tools can offer greater precision and efficiency.
With these tools in hand, you’ll be well-equipped to begin measuring your shower enclosure accurately and confidently. In the next section, I’ll guide you through identifying your shower type, which is the first step toward choosing the right door.
3. Step 1: Identify Your Shower Type
Before I even touched the tape measure, the first thing I did was figure out what kind of shower enclosure I was working with. Identifying your shower type is essential because it determines how and where you take your measurements—and ultimately, what kind of shower door will fit best.
Alcove Shower
An alcove shower is enclosed on three sides by walls, with just the front side open for the shower door. This is one of the most common setups and often works well with sliding, hinged, or bi-fold doors. When measuring for an alcove shower door, I focused on the width and height between the two side walls and checked how level everything was.
Corner Shower
My guest bathroom has a corner shower, which is built into a corner and usually features two glass sides. These configurations are a bit trickier to measure because of the angles and limited space. For this type, I had to be extra careful to measure both glass panel sections accurately and account for how the door would open without hitting anything nearby.
Tub-to-Shower Combo
If you’re working with a tub-to-shower combo like I did in my main bath, you'll be measuring from the top edge of the tub rather than a flat shower base. These setups typically use bypass sliding doors or track-mounted framed doors. It’s important to measure the interior dimensions of the tub opening and consider the tub’s curves or slope.
Frameless vs. Framed Shower Doors
Once I knew the layout, I had to decide between a frameless or framed shower door. Frameless shower doors offer a clean, modern look but require walls to be plumb and surfaces to be level. Framed doors are a bit more forgiving in that regard. Your choice will directly influence how precise your measurements need to be—and how your shower door is installed.
Understanding your shower type is the foundation for everything that follows. In the next step, I’ll show you how to properly measure the width of your shower opening.
4. Step 2: Measure the Width
Once I identified my shower type, the next step was to measure the width of the shower opening. This is one of the most critical parts of the shower door measurement process. Whether you're installing a custom glass enclosure or a standard framed door, accurate width measurements will ensure a snug, leak-free fit.
Measure at the Top, Middle, and Bottom
I started by using a reliable tape measure to check the width in three different spots: the top, the middle, and the bottom of the shower opening. It’s important to measure from wall to wall in each of these areas because your walls might not be perfectly straight—even if they look like they are.
I recorded each measurement carefully. For example, in my alcove shower, I found a slight variation of about 1/8 inch between the top and bottom widths, which is pretty common in older homes.
What to Do If the Measurements Vary
If your three width measurements aren’t exactly the same (like mine), don’t panic. For a framed shower door, you’ll usually go with the smallest width to ensure the frame fits properly. If you're ordering a frameless shower door, it's even more important to know exactly where the variation occurs so your custom door can be cut accordingly. Frameless glass doesn't have much room for adjustment, so precision is key.
In cases of significant differences—say more than 1/4 inch—you might need to consider shims or even reworking the opening before installation. That’s why I always recommend double-checking each measurement.
Framed vs. Frameless Door Considerations
From my experience, framed shower doors are more forgiving. The metal frame can help conceal minor width differences and provide a more flexible installation. Frameless shower doors, on the other hand, require very accurate measurements and work best with plumb walls and level surfaces.
Now that you have the width nailed down, let’s move on to measuring the height—another crucial detail to get right before purchasing your new shower door.
5. Step 3: Measure the Height
After measuring the width, I turned my attention to the shower door height. Just like the width, getting this part right is essential—especially if you're considering a frameless shower door or ordering a custom glass enclosure. A height that's too short might lead to water splashing out, while a door that's too tall could interfere with ceiling lines or fixtures.
From the Base or Tub Edge to the Top
I began by measuring from the top edge of the shower threshold (or tub edge, in the case of a tub-to-shower combo) straight up to the point where I wanted the top of the door to sit. For most setups, I took this measurement at the highest point of the finished floor or tub and extended it to the desired door height—usually just below the showerhead or to match the height of existing tiles.
In my corner shower, I also double-checked the height along both sides of the enclosure to make sure the floor or base wasn’t sloping. Even a small variation can affect the fit, particularly with frameless doors that require precise alignment.
Standard Height vs Custom Height
If you’re buying a standard shower door, you’ll find most options range between 70 to 76 inches tall. My bathroom ceilings are fairly standard, so I went with a 72-inch height that looked proportional and allowed easy access. However, if you have high ceilings or a unique layout, you might consider a custom shower door height. Frameless doors, especially, offer the flexibility to go taller for a more modern, seamless look.
Keep in mind: taller doors can add to the cost and weight of the glass, so make sure your walls and hinges can support them. I factored that into my decision before finalizing my purchase.
Now that both the width and height are measured, it’s time to make sure your walls and surfaces are properly aligned—which brings us to the next step: checking for plumb and level.
6. Step 4: Check for Wall Plumb and Level Surfaces
After measuring the width and height of my shower enclosure, I didn’t stop there. One of the most overlooked—but extremely important—steps in the shower door measurement process is checking for wall plumb and level surfaces. Especially when planning for a frameless shower door, having properly aligned walls is critical for a smooth installation.
Using a Level to Check Wall Alignment
I grabbed my bubble level and placed it vertically against both side walls of the shower opening. This helped me see whether the walls were plumb (perfectly vertical). I repeated the process horizontally along the base to confirm the threshold was level.
If you have a laser level or digital tool, even better—it gives highly accurate readings. But even with a standard level, I was able to spot a slight lean in one of the walls, something I wouldn’t have noticed just by looking at it.
How Uneven Walls Affect Installation
If your walls aren’t plumb or your base isn’t level, it can cause major issues during installation. In my case, one wall was out by about 3/16 of an inch. That doesn’t sound like much, but for a frameless shower door, it’s enough to cause gaps, misaligned hinges, and even water leakage.
Framed shower doors offer a little more forgiveness because the frame can help bridge small inconsistencies. However, I still recommend fixing anything major before moving forward—especially if you’re going with a custom shower door where exact alignment is essential.
By confirming that everything was level and plumb, I avoided a lot of potential headaches later. With that box checked, I was ready to move on to recording my final measurements and preparing for the actual installation.
7. Step 5: Record and Double-Check Measurements
Once I had all my measurements—width, height, and wall alignment—I took a few extra minutes to carefully record and double-check everything. It might seem like a small detail, but when you're shopping for a custom or frameless shower door, a tiny mistake can lead to big (and expensive) problems.
Best Practices for Documentation
First, I wrote down every measurement I took, labeling each one clearly: top width, middle width, bottom width, left wall height, right wall height, and so on. I also sketched a simple diagram of my shower enclosure and marked each measurement directly on the drawing. This helped me visualize the space and reduced the chance of confusion later.
When dealing with multiple measurements—especially in a corner or tub-to-shower combo setup—keeping everything organized is a lifesaver. I used a permanent notebook instead of random scrap paper so I wouldn’t lose anything important. You could also snap photos of your notes or use a measurement app if you prefer digital tools.
Why Accuracy Is Critical for Custom Orders
Custom shower doors, especially frameless glass models, are cut to the exact dimensions you provide. That means there’s little room for error. If I had misrecorded even 1/4 inch, it could have caused the door to not fit—or worse, not function properly once installed.
That’s why I double-checked every measurement before submitting my order. I re-measured each point, compared the numbers, and only moved forward once I was 100% confident. This step gave me peace of mind and ensured that the final product would be a perfect fit for my bathroom space.
With precise and well-documented measurements in hand, I was finally ready to choose the right shower door style to match both my layout and my personal taste.
8. Step 6: Choosing the Right Door Based on Measurements
With all my measurements carefully recorded and double-checked, I was ready for the fun part—choosing the right shower door. While style definitely matters, I learned that the measurements I took played a major role in narrowing down the most practical options. The size, shape, and layout of my shower all influenced what type of door would work best.
Sliding, Hinged, and Bi-Fold Options
Since I had a wider alcove shower, I looked into sliding shower doors first. These are great for saving space because they don’t swing outward, and they typically fit well in standard-width openings. If your measurements show a wider opening like mine, sliding doors can offer both style and functionality.
Hinged doors, also known as pivot doors, are perfect if you have enough space in your bathroom for the door to swing open. I considered this for a frameless shower door option, but I had to make sure there was no obstruction—like a vanity or toilet—within the door’s swing radius.
For tighter spaces or smaller enclosures, bi-fold doors are a smart solution. They fold inwards, making them ideal for compact bathrooms or corner showers. If your measurements suggest a narrow opening, this might be the best fit for you.
Considerations for Swing Clearance or Door Overlap
As I was choosing, I also had to think about how the door would function in my space. For hinged doors, I checked the swing clearance against nearby fixtures. Using my measurements, I made sure the door wouldn’t bump into anything when opened fully. For sliding doors, I made sure there was enough overlap between the glass panels so water wouldn’t leak through the center gap.
Another key factor was wall alignment. Since one of my walls wasn’t perfectly plumb, I leaned toward a framed sliding door that could accommodate slight variances better than a frameless option.
In the end, choosing the right shower door wasn’t just about looks—it was about making sure the style matched the measurements, layout, and functionality of my bathroom. With this decision made, I was finally ready to move forward with confidence in my shower door installation.
9. Common Mistakes to Avoid
As I went through the process of measuring for a new shower door, I quickly realized that small errors can lead to big headaches. Whether you're buying a standard framed door or investing in a custom frameless glass enclosure, avoiding common mistakes is just as important as taking accurate measurements. Here are a few pitfalls I learned to steer clear of:
Measuring Tile-to-Tile Instead of Finished Wall-to-Wall
One of the most frequent mistakes I’ve seen—and almost made myself—is measuring from tile edge to tile edge, instead of from finished wall to finished wall. This can throw off the width and result in a shower door that doesn’t fit properly. I made sure to measure from the outermost finished surfaces, not just the visible part of the tile, to get the true width of the opening.
Ignoring Out-of-Plumb Walls
At first, I thought my shower walls looked straight enough. But after checking with a level, I discovered they weren’t perfectly plumb. Ignoring this would have been a costly mistake, especially with a frameless shower door that requires precise alignment. If the walls lean inward or outward, it can affect how the door opens and seals. Always check wall plumb before placing your order.
Forgetting to Account for Thresholds and Headers
Another oversight I nearly made was not considering the shower threshold and any potential headers. The base of the shower—whether a curb or tub edge—affects how you measure height and where the door will sit. Similarly, if your design includes a header bar for support (common in semi-frameless styles), it can influence how tall your door should be. I factored these in to make sure everything would align properly once installed.
By avoiding these simple but common mistakes, I saved myself from installation issues, delays, and unnecessary costs. Taking the extra time to get every detail right really paid off when it came time to install the shower door—and the results were worth it.
10. When to Call a Professional
While measuring for a new shower door can be a straightforward DIY task, there are times when calling a professional is the smartest move. I found that knowing when to seek expert help saved me from potential mistakes and gave me peace of mind throughout the process.
Situations Where Expert Help Is Strongly Recommended
If your shower walls are significantly out of plumb or the opening has irregular angles, I would definitely suggest bringing in a professional. Complex layouts—like curved shower enclosures or tub-to-shower conversions with tight spaces—can be tricky to measure accurately without experience and specialized tools.
Also, if you’re planning to install a frameless shower door, precise measurements are absolutely critical. A professional can ensure that every dimension is exact, which minimizes the risk of ordering a door that doesn’t fit or function properly. In my case, the peace of mind knowing that the measurements were 100% accurate was worth the investment.
Benefits of Pro Measurement Services
Professional measurement services often come with additional benefits. Experts can identify potential installation challenges ahead of time and offer recommendations on door styles or custom adjustments. They usually have access to advanced tools—like laser levels and digital measuring devices—that increase accuracy beyond what a typical homeowner might achieve.
In my experience, hiring a pro also helped streamline communication with the door manufacturer. With precise measurements in hand, ordering and installation went smoothly, saving me time and reducing stress.
Ultimately, knowing when to call a professional can make all the difference between a hassle-free shower door installation and a frustrating experience. If you feel uncertain at any point, don’t hesitate to ask for expert help—it’s well worth it.
11. Conclusion
Measuring for a new shower door might seem daunting at first, but following the right steps makes the process manageable and even rewarding. From identifying your shower type to carefully measuring width, height, and checking wall plumb, each step ensures you get a door that fits perfectly and functions smoothly.
I encourage you to take your time and measure carefully before buying—accuracy at this stage can save you from costly mistakes and installation headaches later on. Whether you’re choosing between framed or frameless doors, sliding or hinged options, your measurements will guide you to the best fit for your bathroom.
If you want to explore compatible shower door types based on your measurements, consider reviewing sliding doors for wider openings or bi-fold doors for compact spaces. And if you’re ever unsure, remember that professional measurement services can provide valuable peace of mind.
With the right preparation, you’ll be one step closer to upgrading your bathroom with a beautiful, well-fitting new shower door.
12. FAQ (Optional)
Can I measure before my tile is installed?
From my experience, it’s best to wait until all tile work is completely finished before taking final measurements. Measuring before the tile is installed can lead to inaccurate results, as even small variations in tile thickness or layout can affect the final opening size. If you absolutely must plan ahead, get a rough estimate—but always take final measurements from the finished wall to wall for the most accurate fit.
Do I need to remove my old door before measuring?
Not necessarily. I was able to measure for my new shower door without removing the existing one, as long as I could clearly access all the key areas: top, middle, and bottom of the opening. Just make sure you're measuring from the finished surfaces and not from any part of the old frame or hardware that will be removed later. If the old door is getting in the way or skewing your measurements, it may be worth taking it out first.
Can I install a frameless door if my walls aren’t perfectly plumb?
It depends on how far off the walls are. In my case, one wall was slightly out of plumb, and it almost affected my decision. Frameless shower doors require more precision because they don’t have a frame to hide imperfections. Minor variances can sometimes be adjusted for during installation, but anything more than 1/4 inch should be evaluated by a professional. If your walls are significantly off, you might want to consider a framed or semi-frameless door instead.
Featured Products
AISU 30" Fluted Design Freestanding Bathroom Vanity with Ceramic Sink, Gray
- $398.96
- $398.96
- Unit price
- / per
AISU 30" Ultra Fluted Design Freestanding Bathroom Vanity with Ceramic Sink, With Leg, White
- $343.58
- $343.58
- Unit price
- / per
AISU 30" Fluted Design Freestanding Bathroom Vanity with Ceramic Sink, White
- $398.96
- $398.96
- Unit price
- / per
AISU 30" Ultra Fluted Design Freestanding Bathroom Vanity with Ceramic Sink, With Leg, Green
- $343.58
- $343.58
- Unit price
- / per
AISU 30" Fluted Design Freestanding Bathroom Vanity with Ceramic Sink, Wood
- $456.70
- $456.70
- Unit price
- / per
AISU 30" Fluted Design Freestanding Bathroom Vanity with Ceramic Sink, With Leg, White
- $328.44
- $328.44
- Unit price
- / per
AISU 30" Ultra Fluted Design Freestanding Bathroom Vanity with Ceramic Sink, With Leg, Wood
- $357.58
- $357.58
- Unit price
- / per
AISU 30" Fluted Design Freestanding Bathroom Vanity with Ceramic Sink, Blue
- $398.96
- $398.96
- Unit price
- / per
AISU 30" Ultra Fluted Design Freestanding Bathroom Vanity with Ceramic Sink, Green
- $442.70
- $442.70
- Unit price
- / per
AISU 30" Fluted Design Freestanding Bathroom Vanity with Ceramic Sink, With Leg, Dark Brown
- $328.44
- $328.44
- Unit price
- / per
AISU 30" Ultra Fluted Design Freestanding Bathroom Vanity with Ceramic Sink, White
- $442.70
- $442.70
- Unit price
- / per
AISU 24" Modern Freestanding Bathroom Vanity with Ceramic Sink, Black
- $330.50
- $330.50
- Unit price
- / per
AISU 24" Modern Freestanding Bathroom Vanity with Ceramic Sink, Dark Grey
- $330.50
- $330.50
- Unit price
- / per
AISU 24" Modern Freestanding Bathroom Vanity with Ceramic Sink, White
- $330.50
- $330.50
- Unit price
- / per
AISU 24" Modern Freestanding Bathroom Vanity with Ceramic Sink, Green
- $330.50
- $330.50
- Unit price
- / per
